Install, Update & Configure WSC
First time install and configuration information
- Requirements & Changelog
- Install Instructions
- Update Instructions
- WSC Encryption Key
- Language Changes
- Change The Text Displayed On The Ticket Confirmation Page
- Add The Credentials Button To WHMCS Templates
Requirements & Changelog
Please ensure your WHMCS environment meets the minimum requirements for the version of WSC you are installing.
WSC V2.1.1
WSC V2.1.1 Requirements
Release Date: 01/01/2024
To use version 2.1.1 Please ensure your WHMCS, PHP and Ioncube versions match the versions below. If they do not. Download the correct version.
| WSC Version | WHMCS Version | PHP Version | IonCube Version |
| V2.1.1 | WHMCS 8.8.x / 8.9.x | PHP 8.1 | Ioncube 12/13 (ic13 on request) |
Release Notes
V2.1.1 contains extensive database changes. Please ensure any previous versions of WSC are disabled before uploading V2.1.1 to your environment. You can now choose to keep credentials in the database when you update WSC. You must still enter the same encryption key that was previously used.
V2.1.1 includes WSC Update. The WSC download now includes two modules. To use WSC Update, you must enable the auto-updater module packaged with the WSC download. All license types can use WSC Update. WSC Update includes the ability to automatically update WSC to the latest version when one is released. This experimental feature should not be used outside of development environments. WSC Update does not yet check the installation of PHP, WHMCS or Ioncube versions and could, therefore, download an incompatible version of WSC. Always initial an update after you have checked that version of WSC is compatible with your infrastructure.
End users can now choose to enable or disable WSC Protect on their accounts from the "Login Protection" menu located in the client area. This option is hidden when you have the "Force Login Protection" feature enabled in the WSC UI.
Changelog
- Fixes to urgent ticket feature.
- Fixes to escalate ticket feature.
- Fixes to WSC Update.
- New Feature: Keep database tables.
- New Feature: End-users can now enable & disable WSC Protect.
- Style changes to WSC UI
WSC V2.1.0
WSC V2.1.0 Requirements
To use version 2.1.0 Please ensure your WHMCS, PHP and Ioncube versions match the versions below. If they do not. Download the correct version.
| WSC Version | WHMCS Version | PHP Version | IonCube Version |
| V2.1.1 | WHMCS 8.8.x | PHP 8.1 | Ioncube 12 |
Changelog
- PHP 8.1 compatibility
- Pro to Free feature release (Frontend Buttons)
WSC V2.0.0
WSC V2.0.0 Requirements
Release Date: 10th January 2020
To use version 2.0.0. Please ensure your WHMCS, PHP and Ioncube versions match the versions below. If they do not. Download the correct version.
| WSC Version | WHMCS Version | PHP Version | IonCube Version |
| V2.0.0 | WHMCS 8.3.x/8.4.x | PHP 7.4 | Ioncube 11/12 |
Changelog
- New WSC UI
- WSC Protect
- WSC Trigger Warnings
- WSC Update
- New Sidebar
- New Banner Designs
- Language Translations
- Choose which buttons to display
Install Instructions
Let's keep everyone secure with Enterprise Security for WHMCS.
It doesn't matter what version of WSC you use, Paid or Free. All that matters is end-user security. Here you will learn how to install the latest version of WSC in a few minutes. There are two ways to install WSC. FTP & File Manager. We deal mostly with cPanel systems but the same process applies to Plesk and DirectAdmin. Once you install WSC, you will get automated version upgrades on Free and Paid licenses.
Download & Upload WSC
From the DevGB client area download the version of WSC you wish to install. Remember to check the requirements for that version against your WHMCS environment. You must use the correct version of WSC or you could see unexpected consequences like error pages.
- Upload WSC via FTP
Extract the WSC download to your desktop. You will see the modules folder. Upload the entire modules folder to the root of your WHMCS install. For example. If you are using cPanel and your WHMCS was at www.dev.gb.net. You would upload the modules folder to the public_html folder. Once uploaded WSC will be located at /modules/addons/tickets_credentials. You will also notice the update module packaged with WSC. This will be located at /modules/addons/updatemanager.
- Upload WSC via File Manager
Connect to your hosting account—for example, cPanel. Click "File Manager" and navigate to the directory where WHMCS is installed. Upload the WSC download from the DevGB client area. Use the file manager to extract the files in the root of your WHMCS install. WSC will be located at /modules/addons/tickets_credentials. You will also notice the update module packaged with WSC. This will be located at /modules/addons/updatemanager.
Activate WSC
- In the WHMCS administration area navigate to Settings > Addon Modules. Activate the Update Manager and WSC modules.
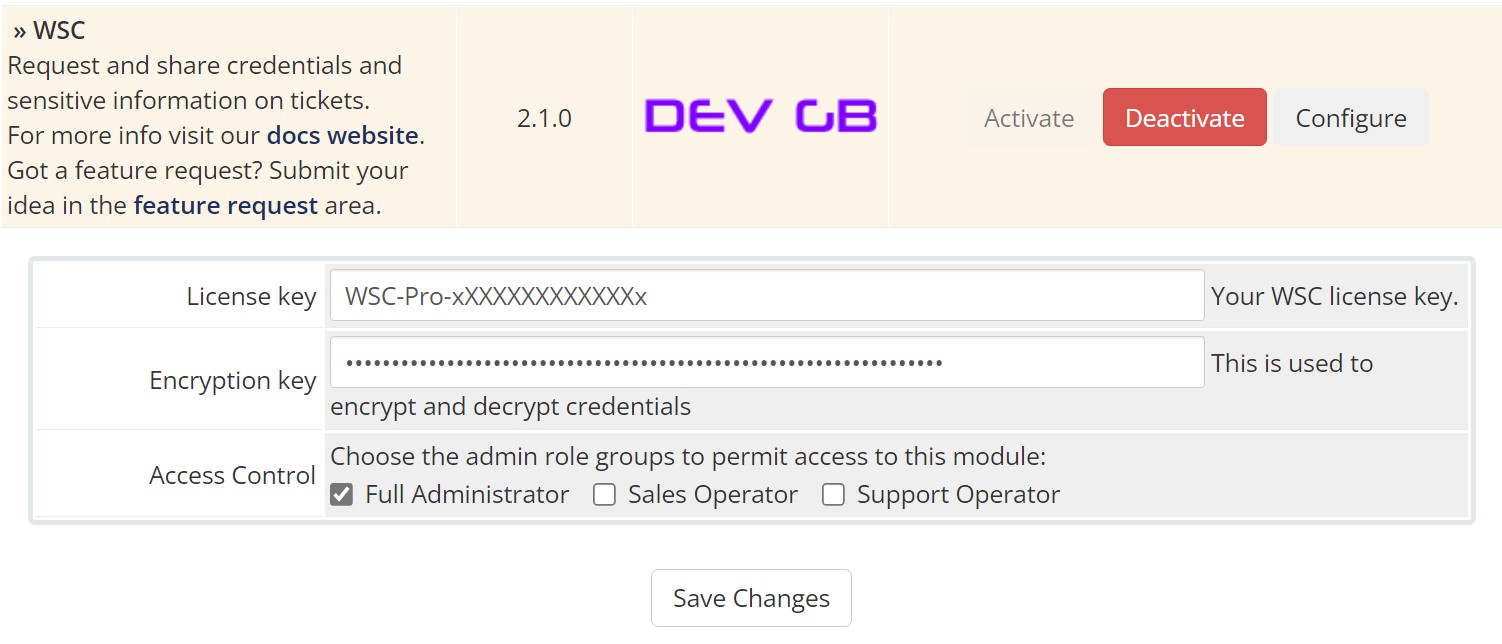
- Assign admin privileges to both modules and enter an Encryption Key for WSC.
- The encryption key needs to be 16 letters long at minimum. HiGhEr and LoWeR case with numb3rs.
- Please see WSC encryption keys for more information.
- The encryption key needs to be 16 letters long at minimum. HiGhEr and LoWeR case with numb3rs.
Configure Auto_Reply Cron (WSC Pro Licenses)
So that the ticket updater posts updates to tickets configure the below cronjob to run every minute or five minutes. The cron command below assumes you are using cPanel with Easy Apache and PHP 8.1. The path to the cron file is /modules/addons/tickets_credentials/autoreply_cron.php for other environments.
cPanel - PHP 8.1
/opt/cpanel/ea-php81/root/usr/bin/php -q /home/CPANEL_USER_NAME/public_html/modules/addons/tickets_credentials/autoreply_cron.php >/dev/null 2>&1CloudLinux - ALT PHP 8.1
/opt/alt/php81/usr/bin/php -q /home/USERNAME/public_html/modules/addons/tickets_credentials/autoreply_cron.php >/dev/null 2>&1
Configure WSC
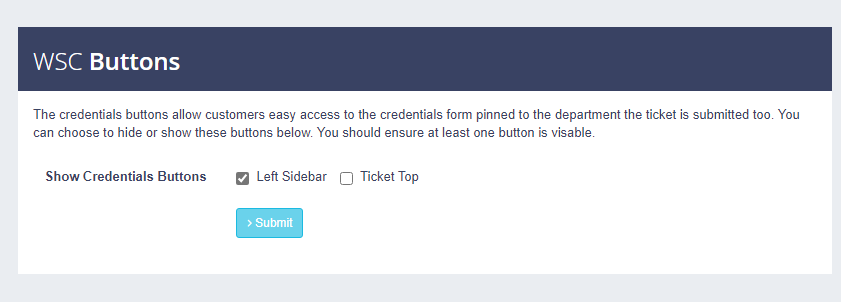
WSC is now installed and ready to be configured. This part differs for Free and Paid licenses so we will deal with the basics. For all users, you can deploy WSC automatically. Navigate to Configuration in the WSC UI, at the bottom under WSC Buttons. Click where you would like to show the credentials button. Click submit.
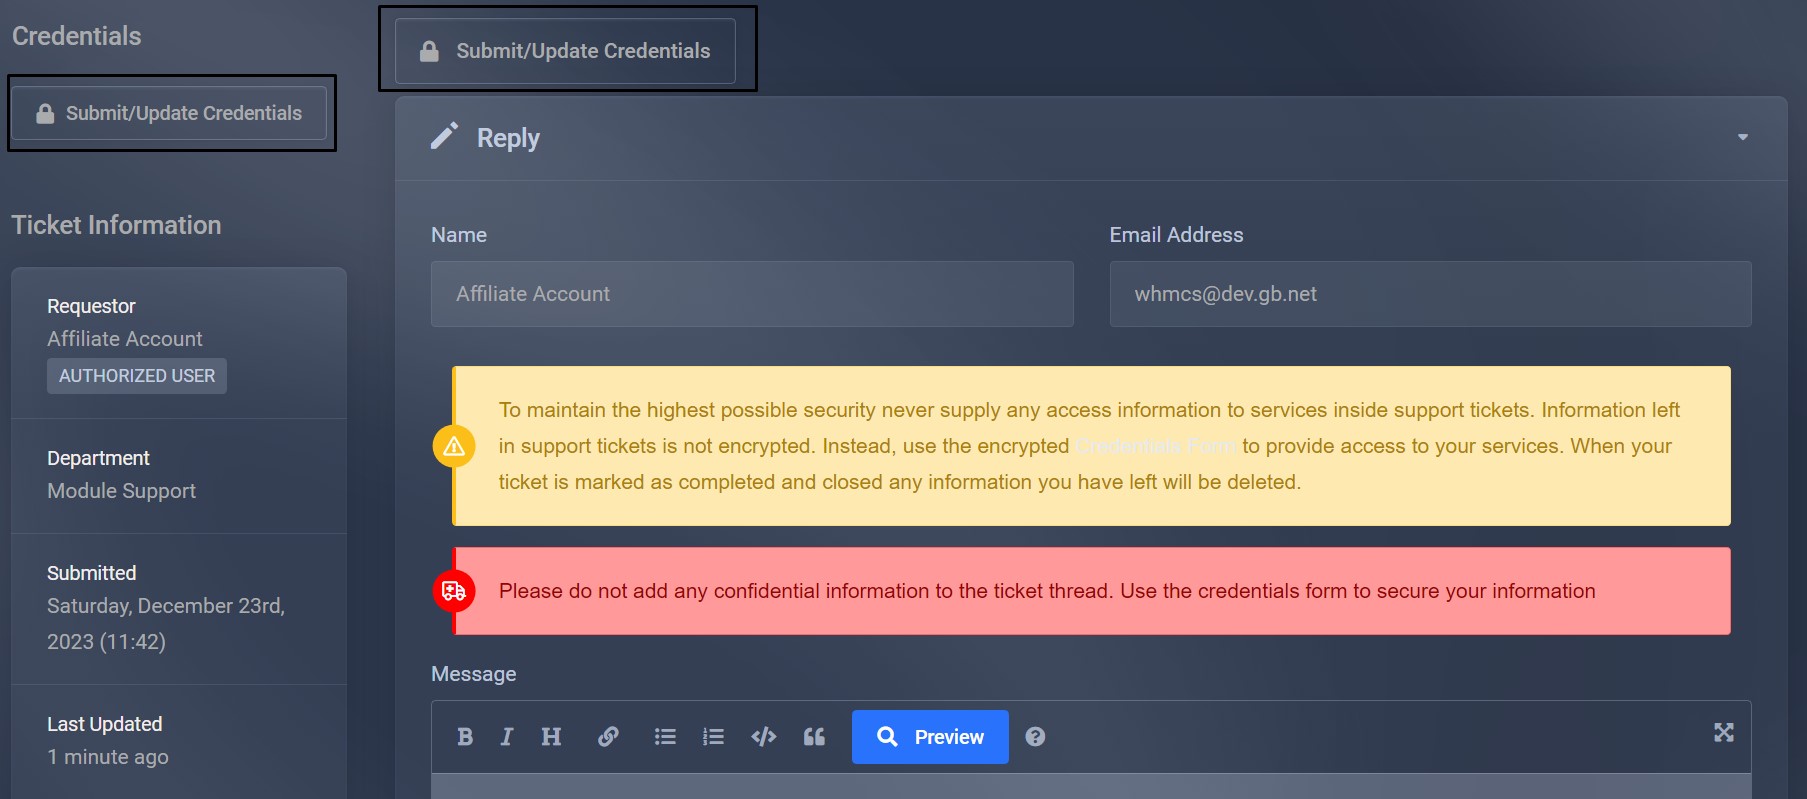
Users can use this area to supply encrypted credentials displayed on the "Credentials" tab in the WHMCS admin area.

Update Instructions
Since V2.1.1 we package WSC with the DevGB Update Manager. The Update Manager periodically checks our servers for a version change on the DevGB modules you have installed. If there is a version mismatch between you and us, the update manager will notify you. There are three notifications.
- An Icon in the top bar of the WHMCS admin area.
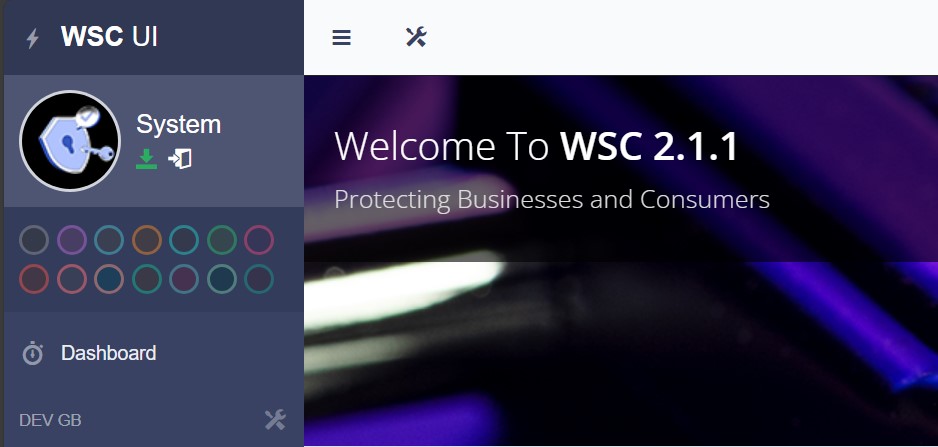
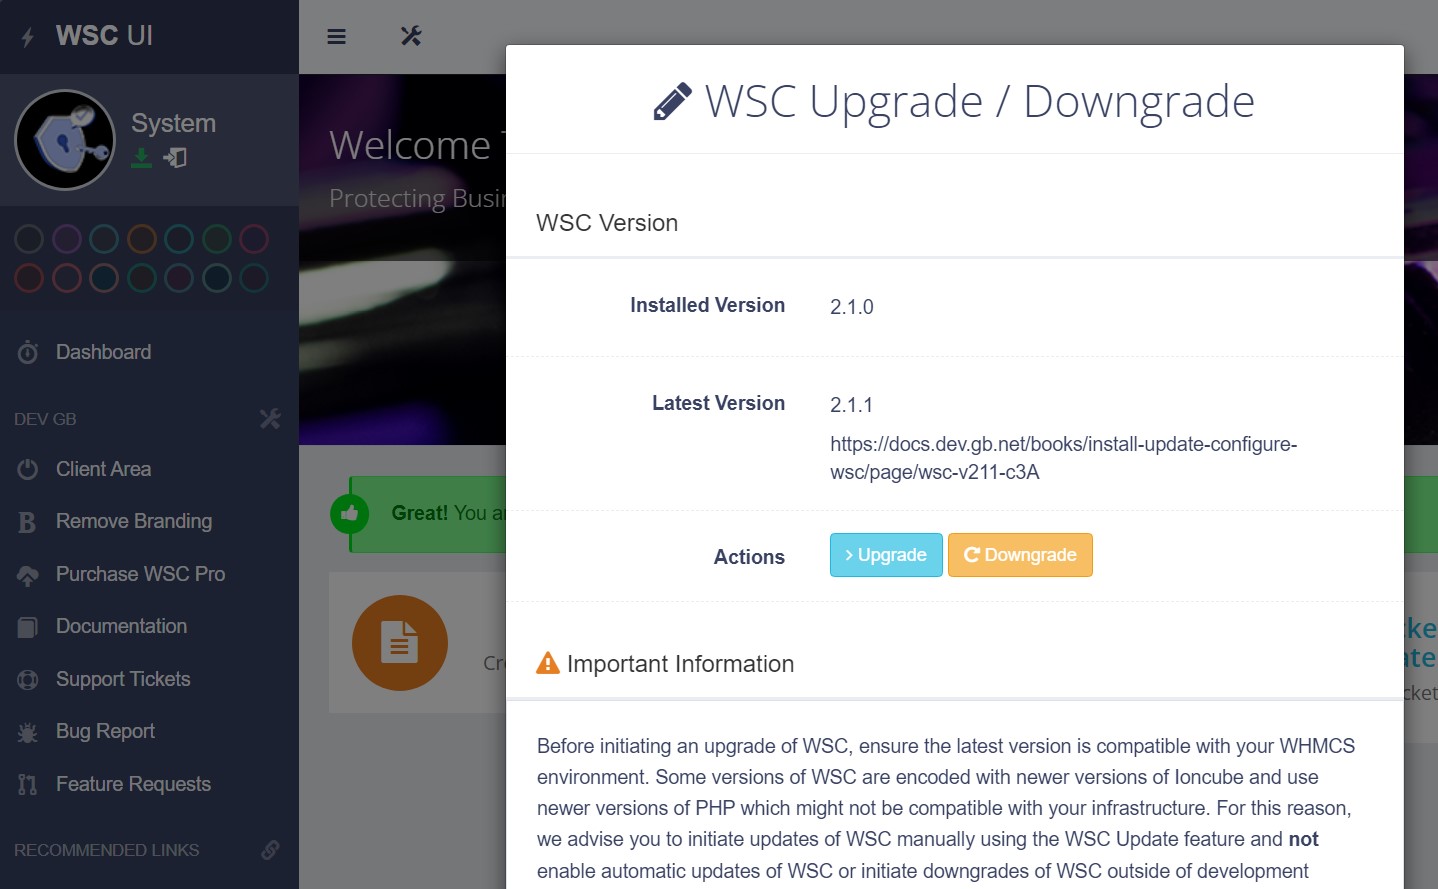
- The update icon in WSC illuminates (displayed below).
- An email sent to WHMCS administrators.
Automatic Update
We recommend using the Update Manager to update any DevGB modules. Check the update requirements against your WHMCS version, PHP version and Ioncube version. If your environment meets these requirements click the green update icon in the WSC UI and then the "Upgrade" button on the modal.
Manual Update
You can also update WSC the old-fashioned way. Always follow these steps in order. Most WSC updates contain database changes that are written when the module is enabled. You must disable WSC before updating.
- Download WSC to your desktop and extract the files to your desktop.
- Disable WSC from Settings > Addon Modules > WSC > Deactivate.
- Connect via FTP and locate the root of your WHMCS install.
- Upload the modules folder overwriting all files.
- Enable WSC from Settings > Addon Modules > WSC > Enable and assign admin privileges
- Enter the WSC license key and Encryption Key.
- Remember to use the same WSC encryption key or any details in the database will be inaccessible.
- Enable Update Manager from Settings > Addon Modules > WSC > Enable and assign admin privilege.
- Navigate to Addon Modules > WSC > WSC Forms and click "Save at the bottom".
WSC is now updated and you can configure the module as required.
WSC Encryption Key
Create a strong encryption key
The encryption key is used to encrypt any data that end users place in the credentials form. The only way to see credentials is to provide the key to decrypt the information. Even anyone with access to your database cannot see any encrypted information. The only place the key is used is inside the WHMCS administration area. It's stored in hashed format. When creating an encryption key we advise you to use a website like Strong Random Password Generator (passwordsgenerator.net). Your key needs to be at least 16 letters and numbers long. These can be higher and lowercase but you cannot use special characters like @&*%^.
Here are a few examples of some strong strings.
ztQ92uVGfDvaZkePj8CN3sxhMrgRBHbAqLdwU5TXc7K6ynWS4m
wu8yBgc9GQ6HTAXC4SFkNERe2fUn5sW3JLazYr7dqbVpxZMvDK
UnXzNyBLh8pc2FJgjKfErZTkQeSRPa6GudmDqHxw4C5sWVt39Y
wSYmbTcCrDk2uUGqA4ptNfVndWK3MxzPs68veQH9XLyF5ZJhgj
CTBGFEArbxcYKqv7H869Sh5pWzknuZJjRXdUPf2wM4ge3DmytV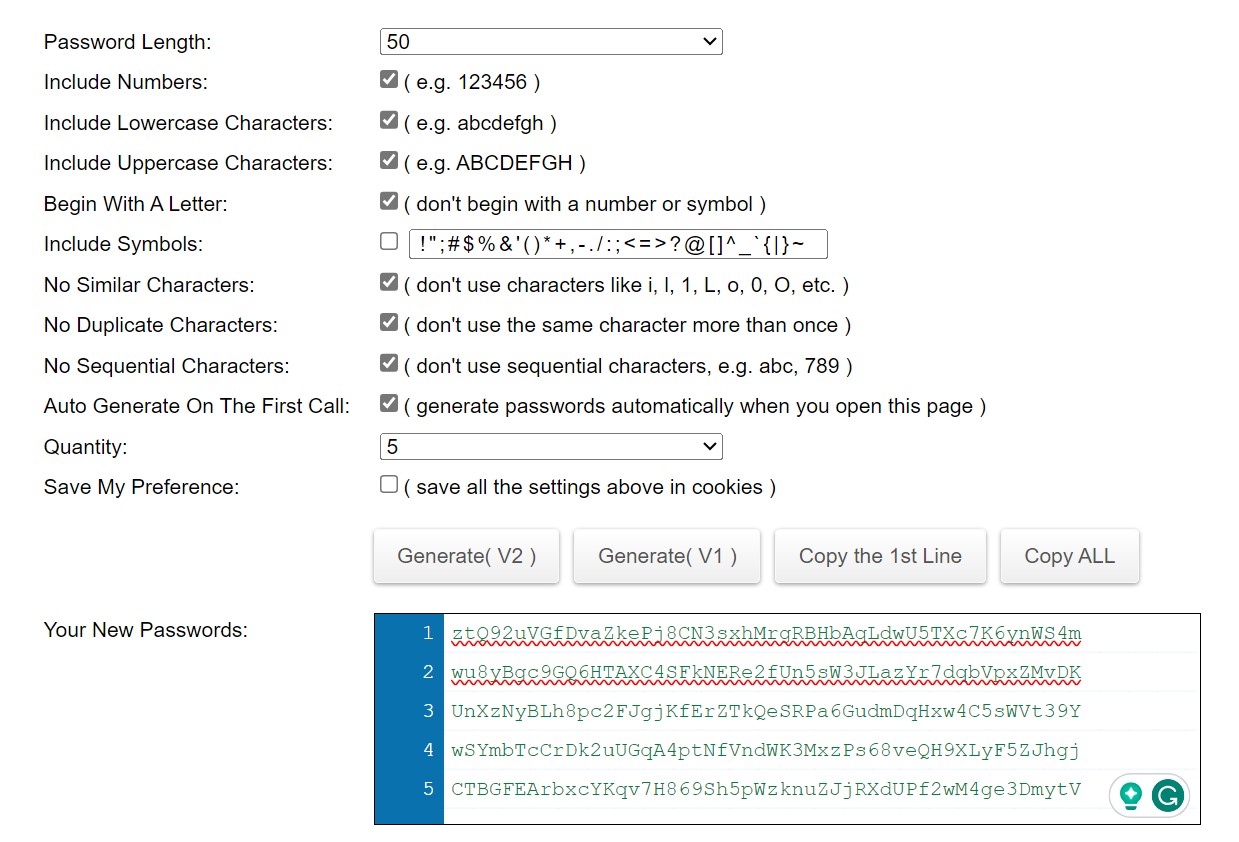
Key Security
You must keep a copy of the encryption key you use. Without the key, any data in the database will become inaccessible. We advise you to keep your key on a USB stick in a locked safe. Do not store it on the server with WHMCS and we advise you don't store it in an email account or Cloud storage account. If you do, store it in a password-protected zip file.
If you ever disable WSC you will need to enter the same encryption key again to access any credentials attached to current open support tickets. All data collected is deleted when support tickets are closed.
Language Changes
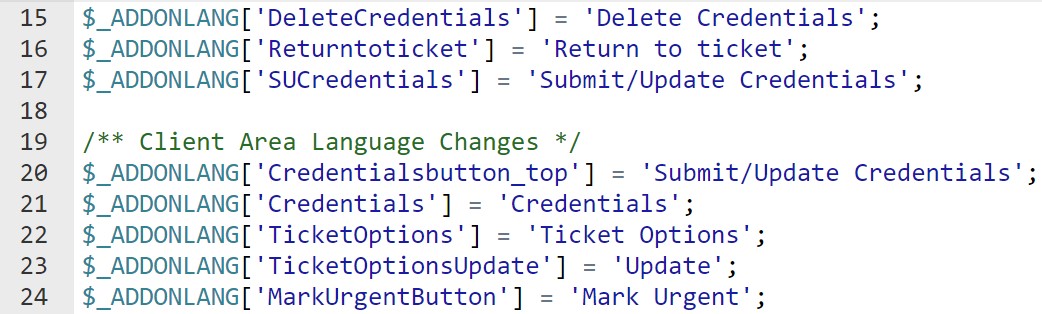
WSC is compatible out of the box with all of the default languages WHMCS supports. We have included translations for all English language strings in the language files. These are located at /modules/addons/tickets_credentials/lang. You can download these to your desktop and modify them as required but you mustn’t change the name of the files.
Change Language Strings
As an example,
- In the WSC download navigate to /tickets_credentials/lang
- Open up the english.php file
- Change the text that is inside the quotes ‘EXAMPLE’ to your choice
- Save and upload the file to /modules/addons/tickets_credentials/lang/
- Your language or text has now been changed
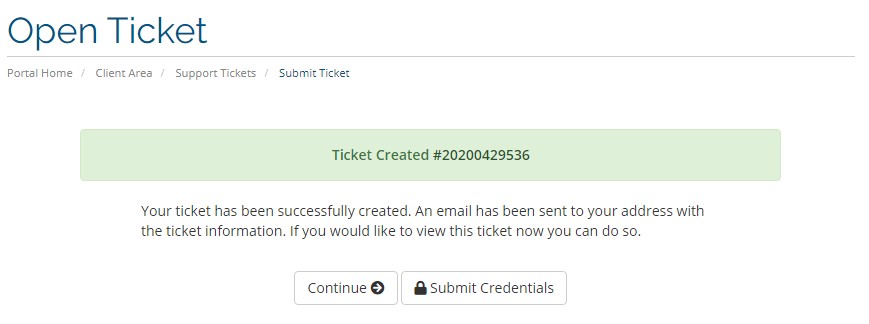
Change The Text Displayed On The Ticket Confirmation Page
When an end-user has submitted a request WSC can automatically forward them to the credentials form. If this feature is not enabled end users will see the default ticket submission page. The text on this page can be edited in the WHMCS language files by using an overrides file.
Step-By-Step Instructions
Create the folder ‘overrides’ within the ‘lang’ folder located at /lang. But, if you already have this folder and an overrides file just place the below code into the file and edit the text as required.
- Create or copy the language file you want to override.
For example, to create an override for the English language you create
/lang/overrides/english.php - Open the file and start the file with a PHP tag ‘<?php’ indicating PHP code is to be used.
- Add the code below changing the text to your requirements;
$_LANG[‘supportticketsticketcreateddesc’] = “Your ticket has been successfully created. An email has been sent to your address with the ticket information. If you would like to view this ticket now you can do so. We advise you to now add your server’s details by clicking the appropriate button below. If you do not add your servers credentials to this ticket you will see a much longer delay in us resolving your problem.”; - Upload or save the file to /lang/overrides/english.php
Add The Credentials Button To WHMCS Templates
WSC is configured to add two buttons via a hook from the WSC UI. In some cases, you might want to add the button to other pages like the ticket submission page. Doing so is simple and just requires the addition of a few extra lines of code on the template. If you use a control panel like cPanel you can use the file manager to edit the templates you are using. At the time of writing this article, the default WHMCS templates are located at /templates/twenty-one/. As an example we will add the credentials button to the page after ticket submission. That template is located at /templates/twenty-one/supportticketsubmit-confirm.tpl.

Step-By-Step Instructions
Open up the /templates/twenty-one/supportticketsubmit-confirm.tpl with a file manager or download it to your desktop. Locate line 6 in this file which looks like this;
<div class="alert alert-success text-center">
<strong>
{lang key='supportticketsticketcreated'}
<a id="ticket-number" href="viewticket.php?tid={$tid}&c={$c}" class="alert-link">#{$tid}</a>
</strong>
</div>Modify the block to add the button code below. The button code is the same for everyone.
<a href="index.php?m=tickets_credentials&tid={$tid}&c={$c}" class="btn btn-default"><i class="fa fa-lock"></i>Submit Credentials</a>After the addition, the block now looks like this;
<div class="alert alert-success text-center">
<strong>
{lang key='supportticketsticketcreated'}
<a id="ticket-number" href="viewticket.php?tid={$tid}&c={$c}" class="alert-link">#{$tid}</a>
<a href="index.php?m=tickets_credentials&tid={$tid}&c={$c}" class="btn btn-default"><i class="fa fa-lock"></i>Submit Credentials</a>
</strong>
</div>Save the file and the WSC Credentials Button will now be displayed on the ticket submission page. You can place the button code on any WHMCS template but you must not use the code outside of WHMCS like in email templates.