Install OVH IP Manager
The OVH IP Manager will allow your customers to perform advanced tasks on any OVH IP. Many customers require services like rDNS records to be configured and without the OVH IP Manager, your customers would have to submit a ticket to your support team asking for this to be completed. This increases response times and decreases the availability of staff. The OVH IP Manager can help tackle these issues. Couple the OVH IP Manager with OVH Notifications and your customers will receive notifications like Spam and Hack notifications which they can then use the OVH IP Manager to unblock services.
Not all features are available on SoYouStart APIs. For example, you cannot enable and disable DDoS protection. Also, bear in mind that OVH imposes strict API call limits. You cannot make more than 5 API calls at the same time. This is a limitation that OVH controls.
Install The WHMCS OVH IP Manager Module
Requirements
- WHMCS 8.x+
- Ioncube Loaders V11/V12
- OVH/SYS Account
- IPv4 Blocks
Generate OVH API Keys
Installation is quick and easy. Before you start, generate an API Key at the correct API URL. The module supports the following APIs. In V1.0 you can only use 1 API at a time. Some APIs are still in Beta testing. Whilst we have tested these APIs, there still could be minor issues. If you see any issues, please report them.
In the paths ensure you enter /* for all boxes.
- CA OVH API
- EU OVH API (Beta)
- SYS CA API
- SYS EU API (Beta)
Next, let’s install the module.
- Download the IP Manager from the Dev GB client area. and unzip the file to your device.
- Upload the modules folder to the root directory of your WHMCS install.
- Activate the module from Settings > Addon Modules
- Enter your license key
- Enter your API Information
- Choose an API
- Click Save
Configure OVH IP Manager Module
The OVH IP Manager module is now installed but requires configuration. So, to configure the module for clients to use we need to add custom fields to your WHMCS product. Doing so is easy and quick. Only a couple of fields are required.
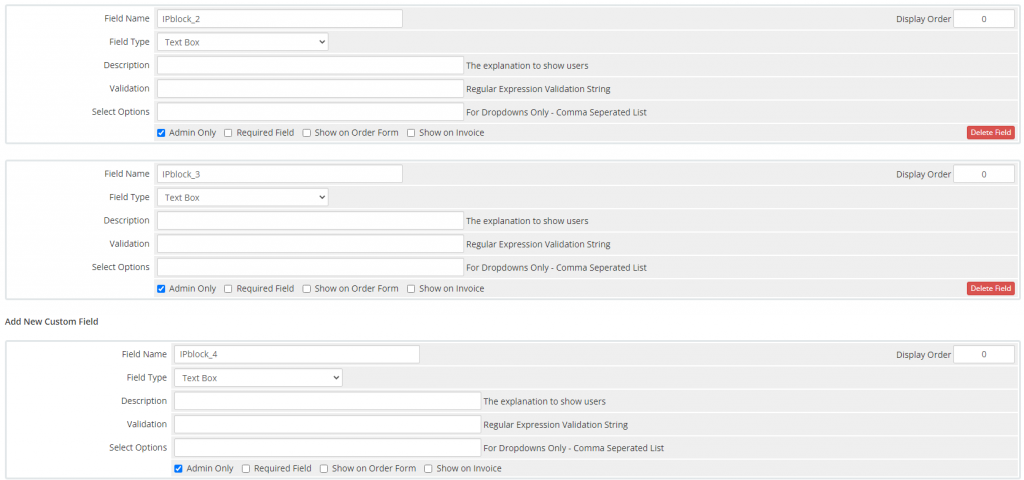
From Settings > Products & Services choose a product that you want the IP manager to work with. Add a new custom field named IP_BLOCK1. The field type should be a text box and the “admin only” box should be ticked. Click save
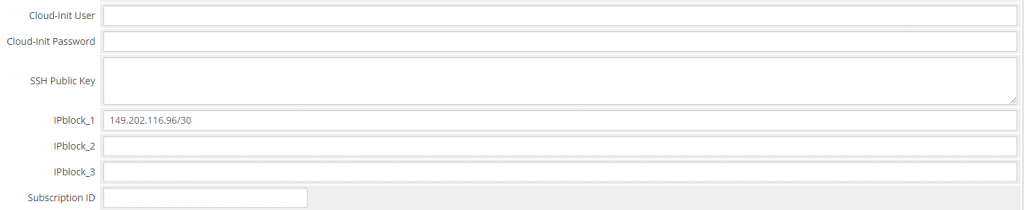
This will allow one IP block to be managed. But, to add more, repeat the process but the next custom field should be called IP_BLOCK2 to add another create a new custom field called IP_BLOCK3. You can configure up to 10 IP blocks in V1. Next, navigate to the customer’s WHMCS profile. At the bottom enter an OVH IP block assigned to the customer.
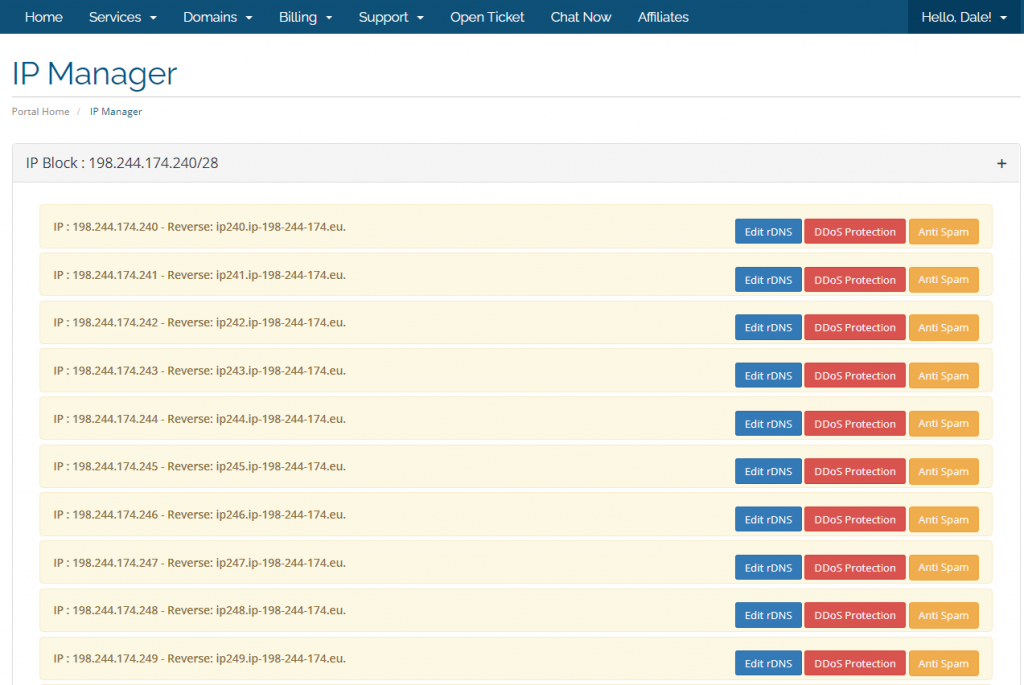
Finally, save the customer’s new profile the module is now set up and customers can manage OVH IP Blocks by clicking the “Support > IP Manager” link.
Language Changes
The module includes language translations for all of the default languages that WHMCS supports. You can make changes to the language used by editing to corresponding language file located in /modules/addons/ipmanagement/lang
No Comments