Install & Update OVH notifications
The OVH Notification WHMCS module will forward critical OVH emails to your end-users keeping them informed about important events. The module will scan the email account that OVH uses to send you notifications and then forward the correct notification to your end user. All templates can be edited to your requirements.
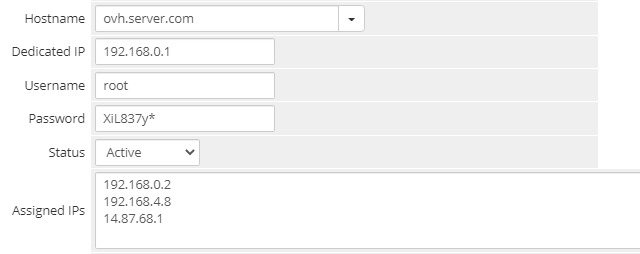
The OVH Notifications WHMCS module will match any IP in a compatible OVH email to the IPs listed in the customer's WHMCS profile. You have to list the customer's IP either in the “Dedicated IP” field or the “Assigned IPs” field. Each IP needs to be on a new line.
Install OVH Notifications
Let’s get started. Before installing OVH notifications It’s a good idea to delete all emails from the account that OVH use to contact you before deploying the module. To Install OVH Notifications;
- Download the module files from your Dev GB client area.
- Unzip the files to your PC.
- Using FTP upload the files to the root of your WHMCS install.
- Navigate to Setup > Addon Modules.
- Click Activate next to OVH Notifications.
- Enter Your License Key.
- Enter your mail server. {mail.yourdomain.com:143/notls}
- Enter your mailbox username and password.
- Select which notifications you want to forward
- Click Save.
That’s the module install completed. The module will check the email account you have configured every 5 minutes. You do not need to and any cron jobs. Ensure you use the same email account to which OVH sends notifications.
Update OVH Notifications
To update OVH Notifications for WHMCS just upload the files using the same process above. There is no need to disable and enable the module again unless stated in the version release notes.
No Comments